Thank you for taking the time to record a podcast episode with us.
Follow the steps below to join our virtual studio:
- Click the link in the email we sent you.
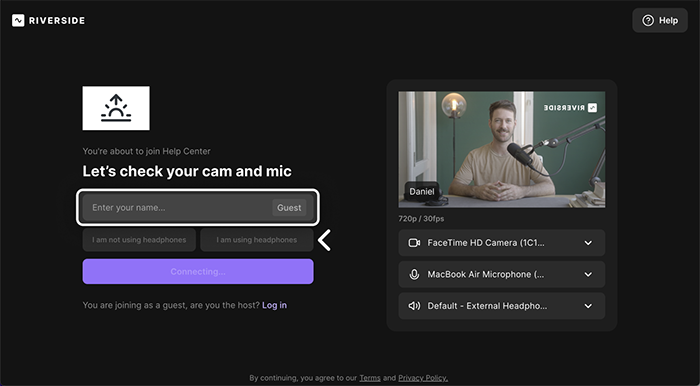
- On the Lobby page, enter your name.
- Click to indicate whether you are using headphones (recommended).

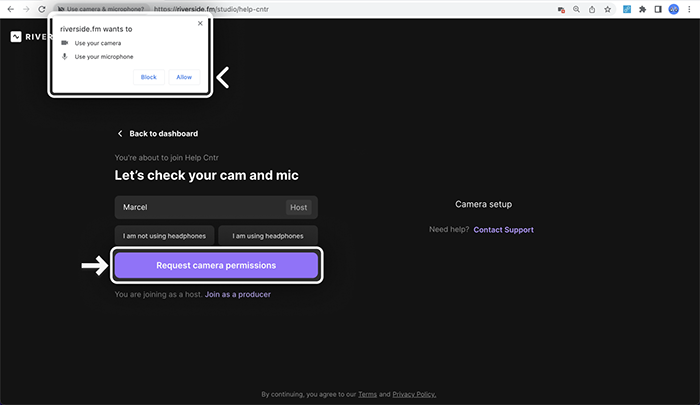
- If you haven't used Riverside before, click "Request camera permissions" then in the pop-up below the address bar, click Allow for both camera and microphone.

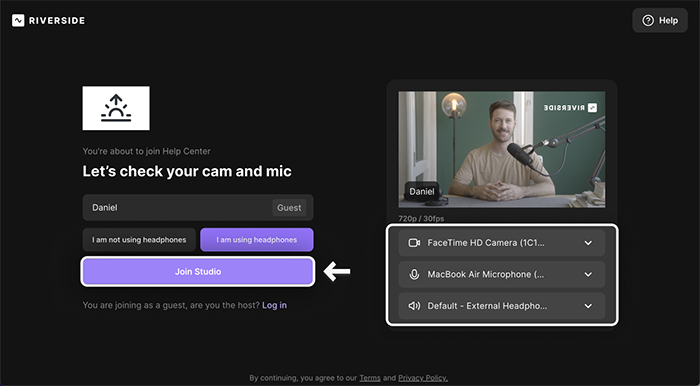
- Look for the video preview on the right side of the page.
- Use the menus to select your microphone, camera, and speaker.
- Click Join Studio to join the call.

- When the Host starts recording, your computer automatically saves your high-quality audio and begins uploading the data to Riverside.
- After the recording ends, please leave your browser tab open until you see the Successfully uploaded ✔ confirmation.
Your recording checklist:
- Find a quiet space where you won't be interrupted.
- Use a computer with a Chrome or Edge web browser that's up-to-date.
- Check your Internet stability. Ethernet cable connections are preferred over Wi-Fi.
- Use an external mic, if possible. Even the mic in your ear/headphones.
- Use wired headphones/earphones to prevent echo and increase audio quality.
- Close all other applications that don't need to be opened during the recording.
- Next turn off all notifications, turn on Do not disturb on all your devices.
Microphone Check:
You can use the Adobe Podcast Mic Check tool here: https://podcast.adobe.com/miccheck# to get feedback on your room echo, background noise, microphone gain, and distance to microphone, along with a feature to Listen to how you sound.
If you have any questions or need assistance before we record, don't hesitate to reach out.